

SPACE & LIGHT · LIGHTING & AMBIENCE
LED Strips: How to Use Them Without Making a Room Feel Harsh
A practical guide to using LED strip lights as concealed, indirect illumination—covering placement, diffusion, brightness, colour temperature, dimming and the details that make the light feel integrated rather than glaring.

LED strips can make a room feel calmer, warmer and more architectural—or they can make it feel like a display case. The difference is usually not the technology itself. It is where the strip is placed, how bright it is, whether the individual LEDs are visible and what surface the light is allowed to fall onto.
Short strips of LED lighting are most convincing when they disappear into the room and the light, rather than the strip, becomes the visual feature. Concealed behind a shelf, under a cabinet, inside a recess or along an architectural edge, they can add a low layer of illumination that supports the rest of the lighting scheme.
This guide focuses on that softer use. For the broader room-level approach—ambient, task and accent layers together—start with our guide to lighting for a sitting room.
What LED Strips Are Actually Good At

LED strip lights are particularly useful where a conventional lamp or fitting would be visually intrusive or physically difficult to place. Their narrow, flexible form makes them suited to shelves, cabinetry, alcoves, coves, media units and concealed edges.
They are less successful when used as a bright exposed line simply because there happens to be an empty edge available. Treat the strip as a tool for shaping light rather than as decoration in its own right.
Why LED Strips Can Feel Harsh
Harshness usually comes from a combination of excessive brightness, direct view of the LEDs, cool colour temperature and strong contrast between the strip and the surrounding room.
The Illuminating Engineering Society defines glare as a visual condition in which there is excessive contrast or an inappropriate distribution of light that causes discomfort or reduces the ability to see detail. An exposed strip can create exactly that problem when the points of light sit directly in the field of view.
Illuminating Engineering Society
Hide the Source Whenever Possible
The simplest way to make strips of LED feel more refined is to hide the strip itself.
Place it behind a lip, inside a recess, beneath a shelf edge or above a cove so the viewer sees reflected light rather than the individual diodes. This turns a row of bright points into a softer wash.
Before fixing the strip permanently, sit and stand in the normal viewing positions. A strip that looks concealed from directly in front can become visible when viewed from a sofa, doorway or lower chair.
Light a Surface, Not the Eyes
LED strip lighting becomes much more comfortable when it has a nearby surface to illuminate.
- A strip under a shelf can wash light down a wall.
- A strip behind a media unit can softly illuminate the wall behind it.
- A strip inside a cove can bounce light onto the ceiling.
- A strip behind a headboard or console can create a low halo without exposing the source.
The distance between strip and surface affects the result. Too close, and individual bright spots may remain obvious; a little more distance allows the beam from each LED to overlap and appear more continuous.
Use a Diffuser or Profile When the Strip Is Exposed

Sometimes the strip cannot be completely hidden. In that case, an aluminium profile with a diffuser can improve both appearance and glare control.
The diffuser softens the individual points of light and creates a cleaner line. It will not magically make an over-bright strip comfortable, so brightness and placement still matter.
Profiles can also provide a more finished physical detail than sticking bare tape directly to visible furniture or joinery.
Use Less Brightness Than You Think
LED strips are often sold by maximum output, but accent lighting rarely needs to run at maximum brightness.
If the strip is there to bring depth to a shelf, wash a wall or create a glow behind furniture, it should usually sit below the brightness of the main task light. The accent should support the room rather than become the brightest object in it.
A dimmable strip is particularly useful because installation conditions are difficult to judge from product specifications alone. Once the strip is in the actual room, you can reduce the output until the effect feels balanced.
Choose Colour Temperature Deliberately
Colour temperature changes the mood more than almost any other setting: lower values look warmer and softer in the evening. For a full comparison of 2700K and 3000K and how to match strips to other lamps, read our warm white LED strip lighting guide.
Add Dimming Where It Improves Control
Dimming is valuable because the right accent level changes with the time of day. A strip that seems subtle during daylight can feel surprisingly bright after the rest of the room becomes darker.
Check that the strip, driver or controller and dimming method are designed to work together. The Energy Saving Trust recommends checking LED and dimmer compatibility rather than assuming an existing dimmer will work correctly.
LED Strips on Shelves and Cabinetry
Shelves are one of the most convincing places for LED strips because the architecture naturally hides the source.
Under-shelf light can reveal objects and wash the wall behind them. Inside joinery, a strip can illuminate a niche without adding a visible fitting. Keep the effect restrained: lighting every shelf equally can make a bookcase feel commercial rather than domestic.
Choose one or two important horizontal lines and let some shelves remain darker. Variation creates depth.
LED Strips Behind a Television
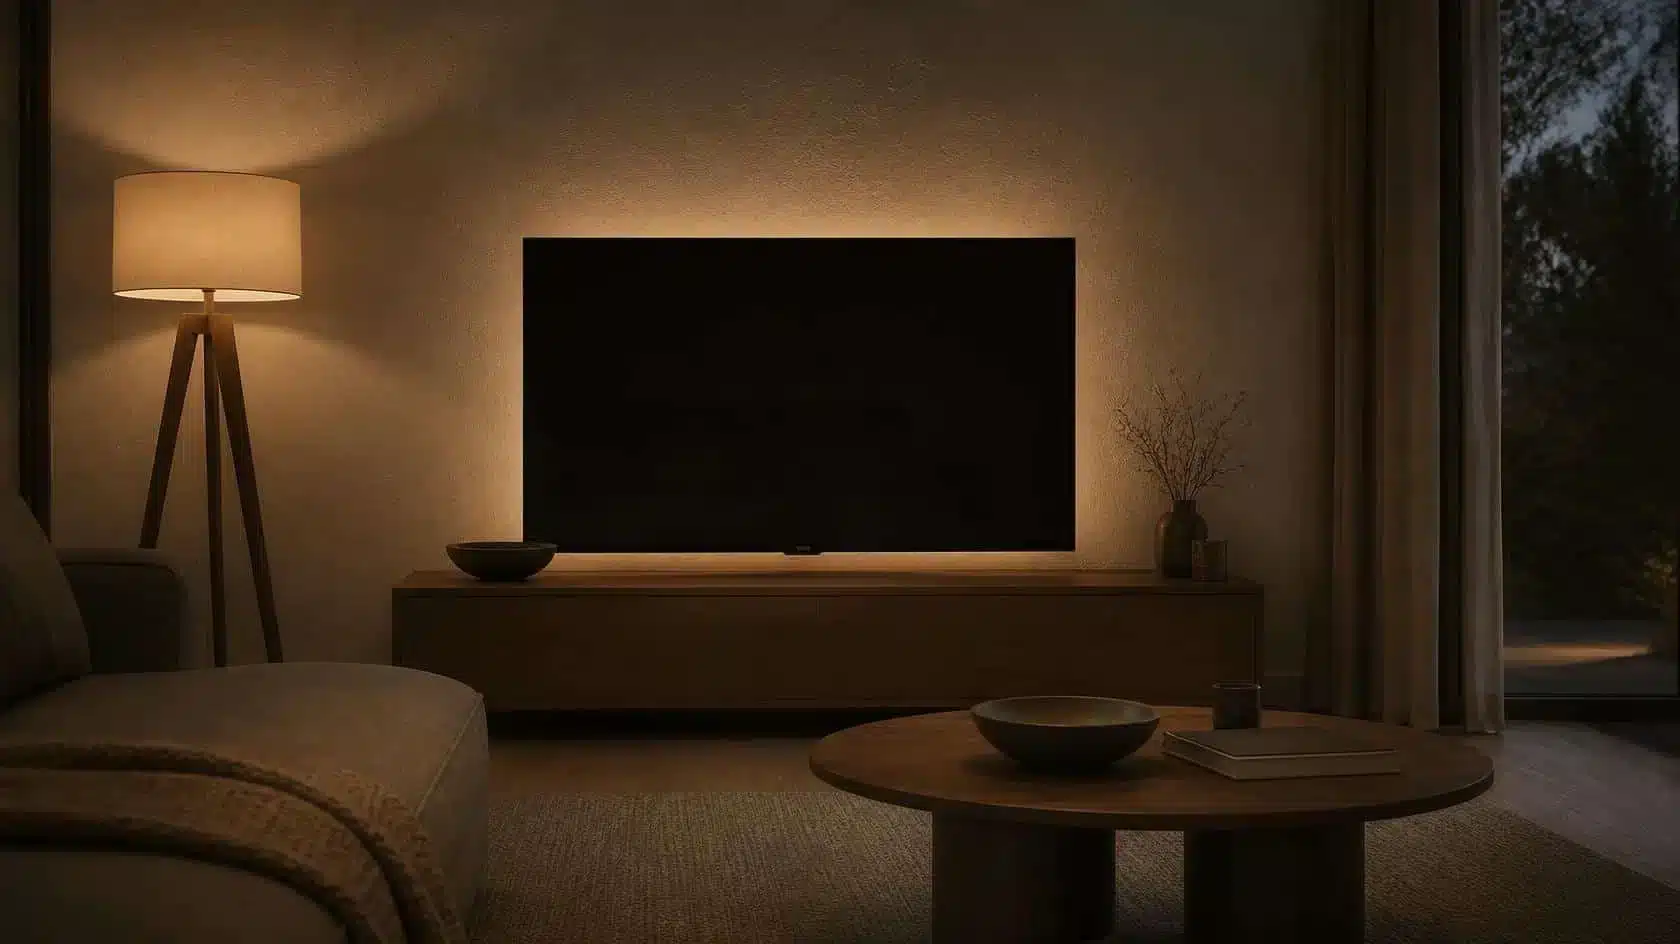
LED strips are frequently installed behind televisions because the screen itself can hide the source while the wall provides a large surface for reflected light.
Keep the output low enough that it does not compete with the picture. Avoid saturated colours unless they are a deliberate part of the room, and keep the colour temperature reasonably compatible with the surrounding evening lighting.
The aim is a quiet halo, not a luminous frame around the screen.
Coves, Ceilings and Architectural Lines
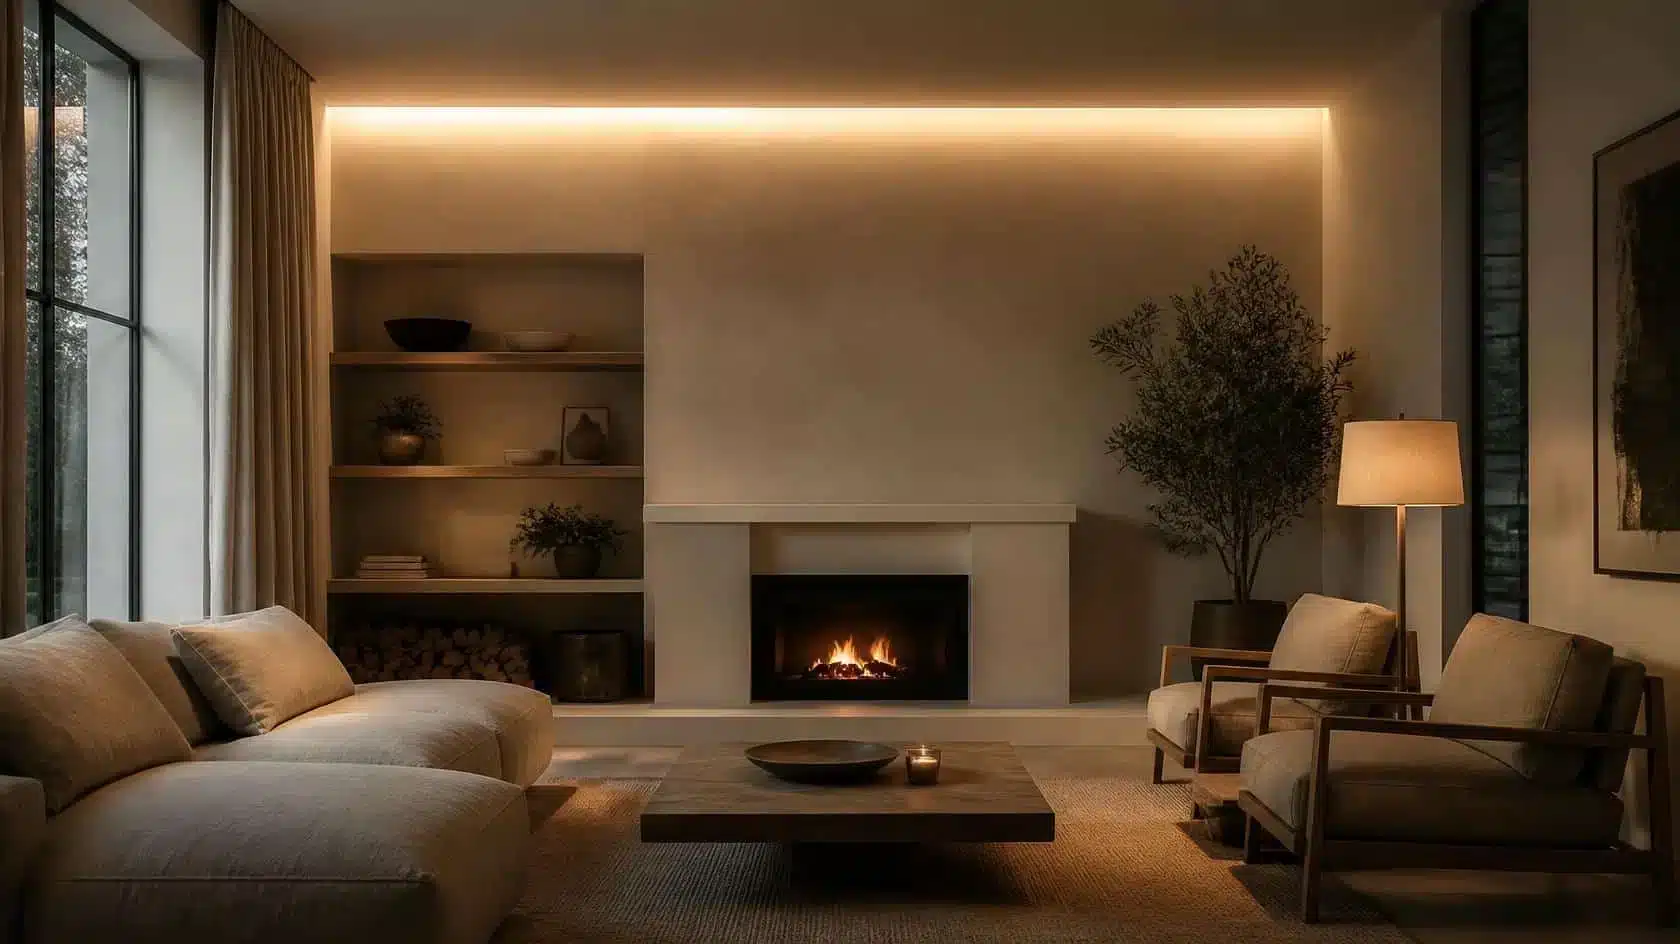
Indirect strip lighting can work especially well in a cove because the ceiling becomes the illuminated surface and the strip itself remains hidden.
Use this carefully. A continuous illuminated line around every edge of a room can become visually dominant. Often one architectural direction or one recessed detail is enough to establish the effect.
Where the strip is part of fixed architectural or mains-wired lighting, plan the detail before installation and use appropriate professional electrical advice.
Cutting and Joining LED Strip Lights
Many LED strip products can be cut, but only at the manufacturer’s marked cut points. Cutting in the wrong place can damage a section or break the electrical path.
If the installation needs corners, gaps or multiple sections, check the product’s connector system before buying. Do not assume every strip can be folded sharply around a corner or joined indefinitely.
Plan the Power Supply and Cable Route
The best visual installation can still look unfinished if the power supply, controller and cable are left as an afterthought.
Before fixing the strip, decide where the power supply will sit, how it will remain ventilated and accessible, and where the cable will enter the furniture or architectural detail. For longer runs, follow the manufacturer’s guidance on maximum length, driver capacity and voltage drop.
Do not conceal power equipment in a way that conflicts with its ventilation or access requirements. Fixed electrical work should be carried out appropriately by a qualified electrician.
Common LED Strip Lighting Mistakes
- Leaving the individual LEDs directly visible from normal seating positions.
- Running accent strips at maximum brightness.
- Choosing a cool colour temperature beside warm lamps without considering the mismatch.
- Using strips around every edge of the room.
- Sticking bare tape onto a visible surface without a finished detail.
- Ignoring the power supply and cable route until the end.
- Cutting the strip anywhere rather than at the marked cut points.
- Using coloured effects where a quiet warm-white accent would suit the room better.
A Simple LED Strip Planning Method
- Decide what surface you want to illuminate.
- Choose a position that hides the strip from normal views.
- Choose the colour temperature to work with nearby lamps.
- Choose the output for accent light, not maximum brightness.
- Add a profile or diffuser if the source may be visible.
- Plan the driver, controller and cable route before fixing anything.
- Test the effect from sitting and standing positions.
- Dim it until the glow supports the room rather than announcing itself.
Frequently Asked Questions About LED Strips
How do I make LED strip lights look less harsh?
Hide the strip from direct view, bounce the light onto a nearby surface, reduce the brightness and use a diffuser where the individual LEDs would otherwise remain visible. A warmer colour temperature can also suit relaxed living spaces.
Can you cut LED strip lights?
Many products can be cut at clearly marked cut points, but the spacing and method vary. Follow the instructions for the specific strip rather than cutting at an arbitrary point.
Do LED strip lights use a lot of electricity?
LEDs are generally energy-efficient compared with older lighting technologies, but actual consumption depends on the strip’s wattage per metre, length and how long it runs. Check the rated power of the complete installation rather than assuming every strip uses the same amount.
What colour temperature is best for LED strips in a living room?
Warm white around 2700–3000K often works comfortably with domestic evening lighting, but the best choice should also match nearby lamps and the room’s materials.
Should LED strips be visible?
Usually not when the aim is soft architectural lighting. Concealing the source and showing the reflected glow generally creates a calmer result.
Use the Glow, Not the Strip, as the Feature
LED strip lights work best when they disappear into the architecture.
Hide the source, give the light a surface to wash across, reduce the brightness and keep the colour temperature coherent with the rest of the room. If the strip is visible, use a proper profile and diffuser rather than relying on bare tape as a finished detail.
The goal is not to make the room look illuminated by LEDs. It is to create a soft layer of light whose source is almost forgotten. For under-cabinet strips in particular, see our kitchen lighting ideas.

Leave a Reply